
Unity Particle Sand: A Comprehensive Guide
Are you looking to add a touch of realism and interactivity to your Unity projects? Look no further than Unity Particle Sand. This powerful tool allows you to create realistic sand, dirt, and other granular materials with ease. In this article, we’ll delve into the various aspects of Unity Particle Sand, from its installation to its customization options. Let’s get started!
Installation

Before you can start using Unity Particle Sand, you’ll need to install it. The process is straightforward and can be completed in just a few steps:
- Open Unity Hub and navigate to the “Manage” tab.
- Click on “Package Manager” and then “Import Package” from the dropdown menu.
- Search for “Unity Particle Sand” and select it from the search results.
- Click “Import” to install the package.
Once the package is installed, you’ll find the Unity Particle Sand components in the Unity Editor’s “Assets” folder. You can now start using it in your projects.
Creating a Sand Particle System
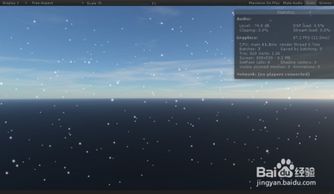
With Unity Particle Sand installed, you can now create a sand particle system. Here’s how to do it:
- Create a new GameObject in your scene.
- Right-click on the GameObject and select “Add Component” from the dropdown menu.
- Search for “Particle System” and select it from the search results.
- Drag and drop the “Unity Particle Sand” component from the “Assets” folder into the newly created Particle System GameObject.
With the Unity Particle Sand component added, you can now customize the particle system to your liking. Let’s explore some of the key customization options:
Customization Options
1. Particle Settings
The Particle Settings section allows you to control the appearance and behavior of the sand particles. Here are some of the key settings:
- Particle Size: Adjust the size of the sand particles to achieve the desired look.
- Particle Shape: Choose from various shapes, such as sphere, cube, or custom, to define the shape of the sand particles.
- Color: Customize the color of the sand particles using the color picker.
- Opacity: Adjust the opacity of the sand particles to control the level of transparency.
2. Emission Settings
The Emission Settings section controls how particles are emitted from the particle system. Here are some of the key settings:
- Rate Over Time: Adjust the number of particles emitted per second.
- Rate by Count: Set the total number of particles emitted over time.
- Speed: Control the speed at which particles move.
- Rotation: Adjust the rotation of the particles to create more dynamic effects.
3. Collision Settings
The Collision Settings section allows you to control how particles interact with other objects in the scene. Here are some of the key settings:
- Collision Type: Choose between “None,” “Box,” “Sphere,” or “Custom” to define the collision shape.
- Collision Force: Adjust the force applied to particles when they collide with other objects.
- Collision Response: Control how particles react when they collide with other objects, such as bouncing off or sticking together.
Advanced Features
Unity Particle Sand offers several advanced features that can help you create even more impressive sand effects. Here are a few highlights:
- Wind Effects: Apply wind forces to particles to create realistic wind effects.
- Gravity: Control the gravity applied to particles to simulate realistic falling and settling.
- Custom Scripts: Use custom scripts to create unique behaviors and interactions for your sand particles.
Conclusion
Unity Particle Sand is a versatile and powerful tool for creating realistic sand and granular materials in Unity. With its easy-to-use interface and extensive customization options, you can


