
Home Depot Sanding Disc: A Comprehensive Guide
When it comes to sanding, the right tool can make all the difference. If you’re in the market for a reliable and versatile sanding disc, look no further than the Home Depot sanding disc. This guide will delve into the details of this product, covering its features, benefits, and how to use it effectively.
Features of Home Depot Sanding Disc

The Home Depot sanding disc is designed to provide a smooth and efficient sanding experience. Here are some of its key features:
- High-Quality Material: Made from durable materials, this sanding disc is built to last and withstand the rigors of sanding tasks.
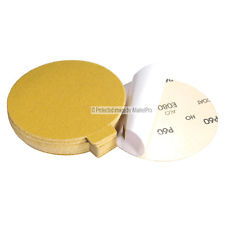
- Multiple Grit Levels: Available in various grit levels, from fine to coarse, this sanding disc can cater to a wide range of sanding needs.
- Easy to Use: The sanding disc is designed for easy installation and removal, making it a convenient choice for both beginners and experienced users.
- Widely Compatible: This sanding disc is compatible with most sanders, including orbital, random orbital, and belt sanders.
Benefits of Using Home Depot Sanding Disc

Using the Home Depot sanding disc offers several advantages:
- Enhanced Sanding Performance: The high-quality material and multiple grit levels ensure a smooth and efficient sanding process.
- Longevity: The durable construction of the sanding disc means it can withstand repeated use, saving you money in the long run.
- Convenience: The easy-to-use design and wide compatibility make this sanding disc a versatile choice for various sanding tasks.
- Cost-Effective: The affordable price of the Home Depot sanding disc makes it an excellent value for your money.
How to Use Home Depot Sanding Disc
Using the Home Depot sanding disc is a straightforward process. Here’s a step-by-step guide to help you get started:
- Select the Right Grit Level: Choose the grit level that best suits your sanding needs. Fine grit levels are ideal for finishing touches, while coarse grit levels are better for removing material quickly.
- Attach the Sanding Disc: Place the sanding disc on your sander and secure it in place according to the manufacturer’s instructions.
- Start Sanding: Begin sanding the surface in a consistent, overlapping pattern. Apply even pressure to avoid creating uneven sanding marks.
- Check for Progress: Periodically inspect the surface to ensure even sanding and make any necessary adjustments.
- Change Grit Levels if Needed: If you need to remove more material or achieve a finer finish, switch to a different grit level.
- Clean the Surface: Once you’ve achieved the desired sanding result, clean the surface to remove any sanding dust or debris.
Comparison with Other Sanding Discs
When comparing the Home Depot sanding disc with other options on the market, there are a few key factors to consider:
| Feature | Home Depot Sanding Disc | Other Sanding Discs |
|---|---|---|
| Material Quality | High-quality material for durability | Varies by brand and model |
| Grit Levels | Multiple grit levels available | Varies by brand and model |
| Compatibility | Compatible with most sanders | Varies by brand and model |
| Price | Affordable and cost-effective | Varies by brand and model |
Customer Reviews and Ratings
Customer reviews and ratings can provide


