
Unlocking Sand Pavers: A Comprehensive Guide
Are you considering sand pavers for your outdoor space? If so, you’ve come to the right place. Sand pavers are a versatile and durable option for pathways, patios, and driveways. In this detailed guide, we’ll explore the benefits, installation process, maintenance, and more to help you make an informed decision.
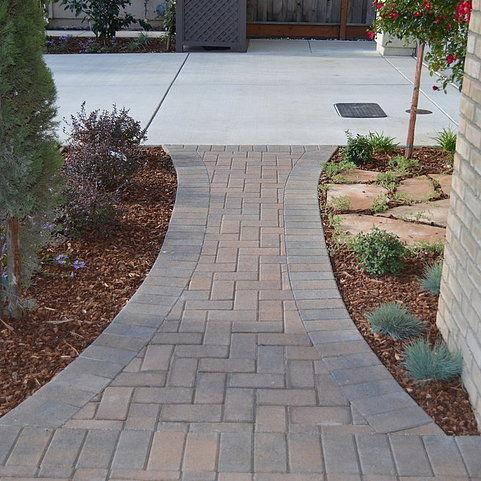
Understanding Sand Pavers

Sand pavers are a type of interlocking paving stone that is filled with sand to create a stable and level surface. They are made from a variety of materials, including concrete, clay, and natural stone. The sand acts as a stabilizing agent, preventing the pavers from shifting or settling over time.
One of the key advantages of sand pavers is their ability to accommodate slight movements in the ground. This makes them an ideal choice for areas that may experience settling or shifting, such as around trees or near buildings.
Benefits of Sand Pavers

There are several reasons why sand pavers are a popular choice for outdoor projects:
-
Versatility: Sand pavers come in a wide range of colors, sizes, and shapes, allowing you to create a unique and personalized design.
-
Durability: Made from high-quality materials, sand pavers are designed to withstand heavy traffic and harsh weather conditions.
-
Ease of Installation: Sand pavers are easy to install and can be laid over existing surfaces, saving time and money.
-
Low Maintenance: Once installed, sand pavers require minimal maintenance, making them a convenient choice for busy homeowners.
-
Sustainability: Sand pavers are an eco-friendly option, as they are made from recycled materials and can be recycled at the end of their life.
Installation Process
Installing sand pavers is a straightforward process that can be completed by most homeowners with some basic tools and a bit of patience. Here’s a step-by-step guide:
-
Plan Your Layout: Measure the area and mark the boundaries. Consider the direction of the pavers and any obstacles that need to be accommodated.
-
Prepare the Base: Remove any existing materials and grade the soil. Compact the base using a plate compactor to ensure a stable foundation.
-
Install the Edging: Place the edging along the perimeter of the area to prevent the pavers from shifting. Secure the edging with stakes and ties.
-
Lay the Pavers: Begin laying the pavers in the center of the area, working outward. Use a level to ensure the pavers are even and level.
-
Fill the Joints: Once the pavers are in place, fill the joints with sand. Sweep the sand into the joints using a stiff broom.
-
Compact the Sand: Use a plate compactor to compact the sand, ensuring a stable and level surface.
Maintenance
Maintaining sand pavers is relatively simple and can be done with a few basic tools and cleaning products. Here are some tips to keep your sand pavers looking great:
-
Regular Cleaning: Sweep the pavers regularly to remove debris and dirt. This will prevent stains and extend the life of the pavers.
-
Occasional Deep Cleaning: For a deeper clean, use a pressure washer or a stiff brush with a cleaning solution. Be sure to rinse thoroughly.
-
Sealing: Consider sealing the pavers to protect them from stains and fading. Follow the manufacturer’s instructions for the best results.
-
Immediate Stain Removal: If a stain occurs, act quickly. Use a suitable cleaning solution and scrub the area to remove the stain.
Cost and Availability
The cost of sand pavers can vary depending on the material, size, and quality. On average, you can expect to pay between $3 and $10 per square foot. It’s important to compare prices and quality before making a purchase.
Sand pavers are widely available at home improvement stores, landscape supply yards, and online retailers. Be sure to check for reputable suppliers and read reviews to ensure you’re getting a quality product.


