
Sanding Clear Coat: A Comprehensive Guide
When it comes to maintaining the finish of your vehicle, sanding the clear coat is a crucial step. This process not only enhances the appearance of your car but also protects the underlying paint from environmental damage. In this article, we will delve into the intricacies of sanding clear coat, covering everything from the tools and materials needed to the techniques and best practices to ensure a successful outcome.
Understanding Clear Coat

The clear coat is the outermost layer of paint on your vehicle, serving as a protective barrier against UV rays, chemicals, and physical damage. It also contributes to the shine and depth of the paint finish. Over time, the clear coat can become dull, scratched, or faded, necessitating sanding to restore its original luster.
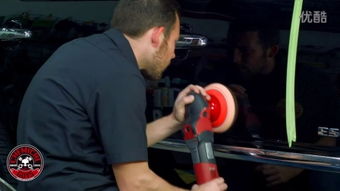
Tools and Materials Needed

Before you begin sanding the clear coat, it’s essential to gather the necessary tools and materials. Here’s a list of items you’ll need:
- Sandpaper: Various grit levels, such as 1500, 2000, 3000, and 4000 grit
- Sanding block: To ensure even pressure and prevent marring
- Sanding wax: To protect the surface and reduce dust
- Lint-free cloth: For wiping away sanding dust
- Microfiber towels: For applying polish and wax
- Polish: To restore shine and depth to the clear coat
- Wax: To provide a protective layer and enhance the finish
Preparation
Before you start sanding, it’s crucial to prepare the surface properly. Here are the steps to follow:
- Wash the vehicle thoroughly to remove dirt, grime, and road tar.
- Use a clay bar to remove any embedded contaminants from the paint surface.
- Apply a pre-sanding compound to further smooth the surface and reduce the amount of sanding required.
The Sanding Process
Now that you have prepared the surface, it’s time to sand the clear coat. Here’s a step-by-step guide:
- Start with a higher grit sandpaper (e.g., 1500) and sand the surface in a circular motion, using the sanding block to maintain even pressure.
- After sanding with the higher grit, switch to a finer grit (e.g., 2000) and repeat the process.
- Continue sanding with progressively finer grits (e.g., 3000, 4000) until the surface is smooth and free of scratches.
- After each sanding session, wipe the surface with a lint-free cloth to remove sanding dust.
Finishing Touches
Once the sanding process is complete, it’s time to apply polish and wax to restore the shine and depth of the clear coat. Here’s how to do it:
- Apply a small amount of polish to a microfiber towel and gently buff the surface in a circular motion.
- After the polish has dried, apply a coat of wax to the surface and buff it with a clean microfiber towel.
Best Practices
Here are some best practices to ensure a successful sanding and finishing process:
- Always sand in a well-ventilated area to avoid inhaling dust particles.
- Use a sanding block to maintain even pressure and prevent marring.
- Change the sandpaper frequently to avoid cross-contamination.
- Take your time and work in small sections to ensure a thorough job.
Conclusion
Sanding the clear coat is a vital step in maintaining the appearance and longevity of your vehicle’s paint. By following this comprehensive guide, you can achieve a smooth, glossy finish that will protect your car from environmental damage. Remember to take your time, use the right tools and materials, and follow best practices to ensure a successful outcome.


