
Sand Cake Decoration: A Detailed Guide for Enchanting Your Treats
Are you looking to elevate your baking game with some stunning cake decorations? Sand cake decoration is a unique and eye-catching technique that can transform a simple cake into a masterpiece. In this article, we will delve into the world of sand cake decoration, exploring its history, techniques, tools, and creative ideas to help you create stunning cakes.
History of Sand Cake Decoration

The art of sand cake decoration has its roots in the 19th century. It originated in Europe, where bakers began experimenting with different materials to create intricate cake designs. Sand cake decoration gained popularity in the early 20th century, with bakers using colored sand to create beautiful patterns on cakes.
Techniques for Sand Cake Decoration
Creating a sand cake decoration involves several steps, from preparing the cake to applying the sand. Here’s a detailed guide to help you master this technique:
-
Prepare the Cake: Start with a well-baked and cooled cake. Ensure the cake is level and smooth to provide a perfect surface for the sand.
-
Prepare the Sand: Use fine, non-toxic sand for cake decoration. You can purchase colored sand from craft stores or create your own by mixing sand with food coloring. Ensure the sand is dry and free of moisture.
-
Apply a Base Layer: Spread a thin layer of buttercream or fondant on the cake to create a smooth base for the sand. This will help the sand adhere to the cake and prevent it from sinking into the cake layers.
-
Apply the Sand: Using a palette knife or your fingers, gently press the sand onto the cake. Start with a light layer and gradually add more sand to create the desired pattern.
-
Shape and Smooth: Use a damp cloth or a fine brush to smooth out any rough edges and ensure the sand is evenly distributed on the cake.
-
Decorate with Additional Elements: Add flowers, leaves, or other decorative elements to enhance the cake’s appearance.
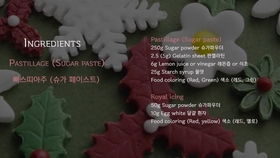
Tools and Materials Needed
Before you start your sand cake decoration project, gather the following tools and materials:
| Tool/Material | Description |
|---|---|
| Non-toxic Sand | Use fine, colored sand for cake decoration. Ensure the sand is dry and free of moisture. |
| Food Coloring | Use food coloring to create a variety of colors for your sand. Avoid using artificial colors, as they may not be safe for consumption. |
| Buttercream or Fondant | Apply a thin layer of buttercream or fondant on the cake to create a smooth base for the sand. |
| Palette Knife or Fingers | Use a palette knife or your fingers to apply the sand onto the cake. |
| Damp Cloth or Fine Brush | Use a damp cloth or a fine brush to smooth out any rough edges and ensure the sand is evenly distributed on the cake. |
| Additional Decorative Elements | Flowers, leaves, or other decorative elements to enhance the cake’s appearance. |
Creative Ideas for Sand Cake Decoration
Once you’ve mastered the basics of sand cake decoration, it’s time to get creative. Here are some ideas to inspire your next cake project:
-
Beach Themed Cake: Create a stunning beach-themed cake with colored sand, seashells, and starfish.
-
Desert Landscape Cake: Use colored sand to create a desert landscape, complete with mountains, cacti, and palm trees.
-
Animal Motifs: Decorate a cake with sand patterns that resemble animals, such as lions, tigers, or elephants.
-
Geometric Patterns: Experiment with different geometric shapes and patterns to create a modern and stylish cake.


