
Sand Cake Book: A Comprehensive Guide
Are you intrigued by the world of baking? Do you find yourself drawn to the delicate art of cake making? If so, you might have come across the term “sand cake.” But what exactly is a sand cake, and how does it differ from other types of cakes? In this article, we will delve into the fascinating world of sand cakes, exploring their origins, ingredients, preparation methods, and much more. So, let’s embark on this delightful journey together.
Origins of Sand Cake

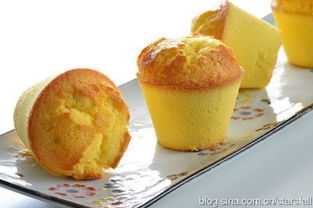
The sand cake, also known as “sandy cake,” has its roots in the United Kingdom. It gained popularity during the Victorian era, where it was a favorite among the upper class. The name “sand cake” comes from the texture of the cake, which is light, airy, and reminiscent of sand. This unique texture is achieved through the use of fine sugar and flour, which give the cake its characteristic sandy consistency.
Ingredients for Sand Cake

Creating a perfect sand cake requires a specific set of ingredients. Here’s a list of the essential components you’ll need:
| Ingredient | Quantity |
|---|---|
| Self-raising flour | 200g |
| Castor sugar | 200g |
| Butter | 100g |
| Beaten egg whites | 3 |
| Beaten egg yolks | 3 |
| Vanilla extract | 1 teaspoon |
These ingredients, when combined in the right proportions, will create a delightful sand cake that is sure to impress your friends and family.
Preparation Method
Now that we have the ingredients, let’s move on to the preparation method. Follow these steps to create a mouthwatering sand cake:
-
Preheat your oven to 180掳C (350掳F) and grease and line a 20cm (8-inch) round cake tin.
-
In a large mixing bowl, cream together the butter and castor sugar until light and fluffy.
-
Add the vanilla extract and mix well.
-
In a separate bowl, whisk together the egg yolks and egg whites until the whites form soft peaks.
-
Sift the self-raising flour into the creamed mixture and fold in gently.
-
Using a spatula, fold in the egg whites until just combined.
-
Pour the batter into the prepared cake tin and smooth the top with a spatula.
-
Bake in the preheated oven for 25-30 minutes, or until a skewer inserted into the center of the cake comes out clean.
-
Remove the cake from the oven and allow it to cool in the tin for 10 minutes before transferring it to a wire rack to cool completely.
Decorating Your Sand Cake
Once your sand cake has cooled, it’s time to get creative with the decorations. Here are a few ideas to help you showcase your culinary skills:
-
Classic Buttercream Icing: A simple and elegant option that complements the delicate texture of the sand cake.
-
Whipped Cream: Light and airy, whipped cream adds a touch of elegance to any sand cake.
-
Fruit Topping: Fresh berries or a compote of your choice can add a burst of color and flavor to your sand cake.
-
Edible Flowers: For a touch of sophistication, add edible flowers to the top of your cake.
Conclusion
Now that you have a comprehensive understanding of sand cakes, you can confidently embark on your baking journey. Whether you’re a seasoned baker or a


