
Cast Iron Skillet Sanding: A Comprehensive Guide
Cast iron skillets have been a staple in kitchens for centuries, prized for their durability and ability to create a perfect sear on meats. However, over time, the seasoning on your skillet can become uneven or worn, leading to a less than ideal cooking experience. Sanding your cast iron skillet is a simple yet effective way to restore its seasoning and improve its performance. In this guide, we’ll delve into the ins and outs of cast iron skillet sanding, covering everything from the tools you’ll need to the best techniques for achieving a smooth, seasoned surface.
Understanding the Importance of Seasoning

Seasoning is the process of applying a thin layer of oil to the cast iron surface and then heating it to create a non-stick coating. This coating prevents food from sticking and also adds a rich flavor to your dishes. Over time, this seasoning can become uneven or wear off, especially if the skillet is not properly maintained. Sanding your skillet helps to even out the seasoning and create a more consistent non-stick surface.
Tools and Materials Needed
Before you begin sanding your cast iron skillet, gather the following tools and materials:
| Tool/Material | Description |
|---|---|
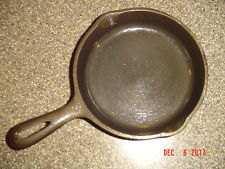
| Cast Iron Skillet | Your trusty skillet that needs a little love |
| Coarse Sandpaper | Coarse sandpaper, such as 80-grit or 100-grit, is ideal for removing the old seasoning |
| Fine Sandpaper | Use fine sandpaper, such as 220-grit, to smooth out the surface and prepare for seasoning |
| Soft Cloth or Paper Towel | For wiping away sanding dust and applying oil |
| Food-Grade Oil | Coconut oil, vegetable oil, or flaxseed oil are all great options for seasoning your skillet |
| Stove or Oven | For heating the skillet during the seasoning process |
The Sanding Process

Now that you have all the necessary tools and materials, let’s dive into the sanding process:
-
Start by cleaning your skillet thoroughly. Use warm water and a non-abrasive sponge to remove any food particles or residue. Be sure to dry the skillet completely before proceeding.
-
Begin by sanding the skillet with coarse sandpaper. Apply firm pressure and sand the entire surface, including the handle and any crevices. This will remove the old seasoning and any rust or uneven spots.
-
Once the entire surface is sanded, switch to fine sandpaper and sand the skillet again. This will help to smooth out the surface and prepare it for seasoning.
-
Wipe away any sanding dust with a soft cloth or paper towel. Be sure to remove all the dust from the skillet before moving on to the next step.
-
Apply a generous amount of food-grade oil to the skillet using a paper towel or soft cloth. Make sure to cover the entire surface, including the handle and any crevices.
-
Heat the skillet in the oven or on the stove for about an hour. This will help the oil to penetrate the cast iron and create a durable seasoning layer.
-
After heating, turn off the heat and let the skillet cool in the oven. Once cool, wipe away any excess oil with a paper towel.
-
Repeat the oiling and heating process two to three times for the best results.
Preventing Future Wear and Tear
Now that your cast iron skillet is looking and performing like new, it’s important to maintain it properly to prevent future wear and tear:
-
Always dry your skillet thoroughly after washing. Water can cause rust, which will damage the seasoning.
-
Apply a


