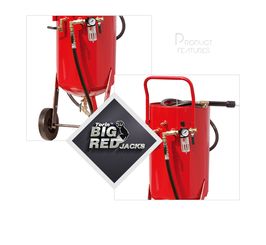
DIY Sand Blaster: A Comprehensive Guide
Are you looking to add a unique touch to your home improvement projects or perhaps embark on a hobby that involves metalworking? A DIY sand blaster can be an excellent tool for achieving a professional finish on various surfaces. In this article, we will delve into the details of building your own sand blaster, covering everything from the materials you’ll need to the safety precautions you should take. Let’s get started!
Understanding the Basics

A sand blaster is a device used to clean, etch, or roughen the surface of various materials, such as metal, wood, and stone. It works by propelling a stream of abrasive material, usually sand, at high pressure to remove rust, paint, or other coatings. Before you begin your DIY project, it’s essential to understand the basics of how a sand blaster operates.
There are two main types of sand blasters: pressure pots and sandblasting cabinets. Pressure pots are portable and suitable for small projects, while sandblasting cabinets offer a more enclosed environment for larger jobs. For this guide, we will focus on building a pressure pot sand blaster.
Materials Needed

Building a DIY sand blaster requires a variety of materials. Here’s a list of essential items you’ll need:
| Material | Description |
|---|---|
| Steel drum | A 5-gallon steel drum with a tight-fitting lid is ideal for the pressure pot. |
| Regulator | A pressure regulator to control the pressure of the air supply. |
| Pressure gauge | A pressure gauge to monitor the pressure inside the drum. |
| Check valve | A check valve to prevent backflow of air. |
| Quick-disconnect couplings | Two quick-disconnect couplings for connecting the air supply and the pressure pot. |
| Flexible air hose | A flexible air hose to connect the compressor to the pressure pot. |
| Abrasive material | Sand or other abrasive material for cleaning and etching surfaces. |
Building the Pressure Pot

Once you have gathered all the necessary materials, it’s time to start building your DIY sand blaster. Here’s a step-by-step guide to assembling the pressure pot:
- Drill a hole in the center of the steel drum lid, slightly larger than the diameter of the pressure gauge.
- Install the pressure gauge in the hole, ensuring it is securely fastened.
- Attach the check valve to the pressure gauge, using the provided mounting hardware.
- Connect the regulator to the check valve, and then attach the pressure gauge to the regulator.
- Attach the quick-disconnect couplings to the regulator and the pressure pot.
- Connect the flexible air hose to the compressor and the pressure pot.
- Fill the pressure pot with abrasive material, leaving enough space for air to expand.
Safety Precautions
Working with a sand blaster can be dangerous if proper safety precautions are not taken. Here are some essential safety tips to keep in mind:
- Always wear safety goggles to protect your eyes from debris.
- Use a dust mask to prevent inhalation of abrasive particles.
- Wear ear protection to safeguard your hearing from the loud noise produced by the sand blaster.
- Ensure the area is well-ventilated to avoid inhaling harmful fumes.
- Keep a fire extinguisher nearby in case of an emergency.
Conclusion
Building your own DIY sand blaster can be a rewarding and cost-effective way to add a professional touch to your projects. By following this comprehensive guide, you’ll be well on your way to creating a functional and safe sand blaster. Remember to prioritize safety and take your time to ensure a successful


