
Orbital Sander 3 Inch: A Comprehensive Guide
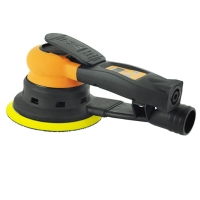
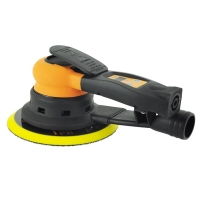
Are you in the market for a reliable and efficient orbital sander? Look no further than the 3-inch orbital sander. This versatile tool is a favorite among DIY enthusiasts and professional woodworkers alike. In this detailed guide, we’ll explore the features, benefits, and usage tips of the 3-inch orbital sander, ensuring you make an informed decision for your sanding needs.
Key Features of the Orbital Sander 3 Inch

The 3-inch orbital sander is designed with several key features that make it a standout choice among sanders of its size:
| Feature | Description |
|---|---|
| 3-inch Sanding Disc | Allows for a larger sanding area, making it ideal for larger projects. |
| Variable Speed Control | Enables you to adjust the sanding speed to suit different materials and sanding stages. |
| Orbital Action | Ensures a smooth and even sanding finish, reducing the risk of swirl marks. |
| Soft Grip Handle | Improves comfort and control during prolonged use. |
| Anti-Vibration Technology | Reduces hand fatigue and enhances overall user experience. |
These features make the 3-inch orbital sander a versatile tool that can handle a wide range of sanding tasks, from smoothing wood surfaces to preparing surfaces for painting or staining.
Benefits of Using a 3-Inch Orbital Sander
There are several benefits to using a 3-inch orbital sander, making it a valuable addition to any workshop or home improvement project:
-
Efficiency: The orbital action of the sander allows for a faster and more efficient sanding process compared to traditional sandpaper.
-
Smooth Finish: The orbital motion reduces the risk of swirl marks, resulting in a smooth and even sanding finish.
-
Variable Speed: The ability to adjust the sanding speed ensures that you can achieve the desired finish for different materials and sanding stages.
-
Comfort: The soft grip handle and anti-vibration technology make the sander comfortable to use for extended periods.
-
Cost-Effective: The 3-inch orbital sander is a cost-effective solution for sanding tasks, as it eliminates the need for expensive sandpaper and sanding blocks.
How to Use a 3-Inch Orbital Sander
Using a 3-inch orbital sander is a straightforward process. Here’s a step-by-step guide to help you get started:
-
Attach the Sanding Disc: Place the sanding disc on the sander and secure it in place using the locking mechanism.
-
Adjust the Speed: Set the desired sanding speed based on the material and sanding stage.
-
Start Sanding: Hold the sander with both hands and apply even pressure as you move it across the surface. Avoid pressing too hard, as this can cause damage to the material.
-
Change Sanding Discs: As the sanding disc becomes clogged with debris, replace it with a fresh one to maintain a consistent sanding finish.
-
Finish Sanding: Once the desired finish is achieved, clean the surface with a damp cloth to remove any remaining dust and debris.
Choosing the Right 3-Inch Orbital Sander
With so many options available, it can be challenging to choose the right 3-inch orbital sander. Here are some factors to consider:
-
Brand Reputation: Opt for a reputable brand known for producing high-quality power tools.
-


