
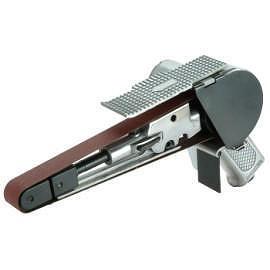
Plans for 2×72 Belt Sander: A Comprehensive Guide
Are you looking to build your own 2×72 belt sander? If so, you’ve come to the right place. In this article, we’ll delve into the details of creating your own 2×72 belt sander, covering everything from materials and tools to assembly and finishing touches. Let’s get started.
Materials and Tools Needed
 Before you begin, it’s essential to gather all the necessary materials and tools. Here’s a list to help you get started:
- 2×72 belt sander frame
- Motor (typically 1 HP or 1.5 HP)
- Belts (various sizes)
- Belts tensioning system
- Beltside guards
- Beltside dust collection
- Wooden blocks for mounting the motor
- Wood screws and bolts
- Wood glue
- Drill and drill bits
- Screwdriver
- Wrenches
- Level
- Measuring tape
- Wood saw
- Sander
Building the Frame
 The frame is the foundation of your 2×72 belt sander. Start by cutting the frame pieces to size using your saw. You’ll need two side pieces, a top piece, and a bottom piece. The dimensions of these pieces will depend on the size of your motor and the overall length you want for your sander.
Once you have all the pieces cut, sand them smooth to ensure a comfortable and safe working environment. Next, assemble the frame using wood screws and bolts. Be sure to check the alignment and make any necessary adjustments before tightening everything down.
Mounting the Motor
 Mounting the motor is a crucial step in building your 2×72 belt sander. Begin by attaching wooden blocks to the frame where the motor will be mounted. These blocks will provide a stable base for the motor.
Next, position the motor on the wooden blocks and secure it using wood screws. Make sure the motor is level and aligned with the frame. You may need to adjust the position of the motor to ensure proper alignment.
Installing the Belt Tensioning System
The belt tensioning system is responsible for keeping the belt tight and ensuring even sanding. There are several types of tensioning systems available, but a common choice is the spring-loaded tensioner.
To install the tensioner, follow these steps:
- Attach the tensioner to the frame using wood screws and bolts.
- Position the belt around the motor pulley and the sander pulley.
- Adjust the tensioner to ensure the belt is tight and not slipping.
Adding Beltside Guards and Dust Collection
Safety and dust control are important considerations when building a 2×72 belt sander. Beltside guards help protect you from flying debris, while dust collection keeps your workspace clean.
To add beltside guards, follow these steps:
- Measure and cut the guards to fit the width of your sander.
- Attach the guards to the frame using wood screws and bolts.
For dust collection, you can use a vacuum or a dust collector. Attach the dust collection system to the back of the sander and connect it to the beltside guards.
Finishing Touches
Once all the components are assembled and installed, it’s time to add the finishing touches. Sand the frame and any exposed wood to ensure a smooth finish. You can also apply a coat of paint or varnish to protect the wood and give your sander a professional look.
Final Thoughts
Building your own 2×72 belt sander can be a rewarding project. By following these steps and using the right materials and tools, you can create a high-quality sander that will serve you well for years to come.
Remember to take your time and pay attention to detail during the assembly process. With a bit of patience and effort, you’ll have a custom 2×72 belt sander that meets all your woodworking needs.
| Step | Description |
|---|---|
| 1 | Collect all necessary
Website: https://skbestpumpsandmotors.com Related Story |


