,Sand Material in Blender: A Comprehensive Guide")
Sand Material in Blender: A Comprehensive Guide
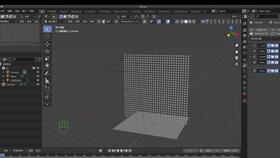
Blender, the versatile 3D modeling software, offers a plethora of features to create realistic and detailed scenes. One such feature is the ability to work with sand materials. In this article, we will delve into the intricacies of sand materials in Blender, providing you with a comprehensive guide to help you master this fascinating aspect of 3D modeling.
Understanding Sand Materials
,Sand Material in Blender: A Comprehensive Guide")
Sand materials in Blender are designed to simulate the appearance and behavior of real-world sand. They can be used to create everything from fine, powdery sand to coarse, grainy sand. Understanding the properties of sand materials is crucial to achieving a realistic look in your 3D scenes.
When working with sand materials, you’ll notice several key properties that can be adjusted to suit your needs:
- Color: The color of the sand can be adjusted to match the environment or the specific type of sand you’re trying to simulate.
- Specularity: This property controls the amount of light that reflects off the sand’s surface, affecting its appearance under different lighting conditions.
- Transparency: Adjusting the transparency of the sand can create a more realistic look, especially when simulating fine, powdery sand.
- Reflectivity: This property determines how much light is reflected off the sand’s surface, affecting its overall appearance.
Creating Sand Materials
Creating a sand material in Blender is a straightforward process. Here’s a step-by-step guide to help you get started:
- Open Blender and create a new material.
- Select the “Diffuse” color and choose a suitable color for your sand.
- Adjust the “Specularity” and “Transparency” properties to achieve the desired look.
- Under the “Transparency” settings, enable the “Use Nodes” option and add a “Fresnel” node to control the transparency based on the angle of the light.
- Under the “Reflection” settings, enable the “Use Nodes” option and add a “Reflection” node to control the amount of light reflected off the sand’s surface.
- Save your material and apply it to the object you want to simulate as sand.
Using Nodes for Advanced Sand Materials
Blender’s node-based system allows for advanced customization of sand materials. By using nodes, you can create complex and realistic sand textures. Here’s a brief overview of some nodes that can be used to enhance your sand materials:
- Image Texture: Use an image texture to add patterns or textures to your sand material.
- Noise Texture: Add noise to your sand material to create a more natural look.
- Color Ramps: Use color ramps to adjust the color of your sand material based on different factors, such as the angle of the light.
- Math Nodes: Use math nodes to create custom calculations for your sand material, such as adjusting the transparency based on the object’s position.
Real-World Applications
Sand materials in Blender can be used in a variety of real-world applications, including:
- Architectural Visualization: Create realistic sand textures for beaches, deserts, and other sandy environments.
- Game Development: Use sand materials to create dynamic and interactive environments in your games.
- Animation: Add sand materials to your animations to create realistic sand effects, such as sand being kicked up by a character’s feet.
Conclusion
Mastering sand materials in Blender can greatly enhance the realism of your 3D scenes. By understanding the properties of sand materials and utilizing Blender’s node-based system, you can create stunning and detailed sand textures. Whether you’re working on architectural visualization, game development, or animation, sand materials are a valuable tool in your 3D modeling arsenal.
| Property | Description |
|---|---|
| Color | Adjusts the base color of the sand material. |


