
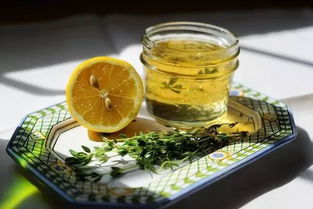
Sand Cherry Jelly: A Delightful Treat with a Twist
Are you ready to dive into a world of flavor and texture? Look no further than sand cherry jelly, a unique and delightful treat that has been captivating taste buds for generations. In this article, we will explore the origins, preparation, health benefits, and culinary uses of sand cherry jelly, ensuring you have a comprehensive understanding of this exquisite dessert.
Origins of Sand Cherry Jelly

The sand cherry, also known as Prunus x cerasifera, is a small, ornamental tree or shrub that produces edible fruits. These fruits are often used in various culinary applications, including the creation of jelly. The sand cherry tree is native to Central Asia and has been cultivated in Europe and North America for its ornamental value and edible fruits.
Historically, sand cherry jelly has been a popular treat in Eastern Europe, particularly in countries like Poland, Ukraine, and Russia. The jelly is made from the ripe fruits of the sand cherry tree, which are known for their tart and sweet flavor profile. Over time, this delightful jelly has gained popularity worldwide, becoming a favorite among fruit enthusiasts and connoisseurs alike.
Preparation of Sand Cherry Jelly
Preparing sand cherry jelly is a straightforward process that requires a few key ingredients and some patience. Here’s a step-by-step guide to help you create your own batch of this delicious jelly:
-
Harvest ripe sand cherries: Look for cherries that are dark red or nearly black, indicating they are fully ripe. Avoid cherries that are still green or have a lot of juice, as they may not be suitable for jelly making.
-
Prepare the cherries: Rinse the cherries under cold water and remove any stems or leaves. Then, crush the cherries using a potato masher or your hands.
-
Strain the cherries: Place a fine-mesh sieve over a large bowl and pour the crushed cherries through the sieve. Collect the juice, which will be used for the jelly.
-
Boil the juice: In a large pot, bring the cherry juice to a boil. Add sugar to the juice, following the ratio of 1 cup of sugar for every 2 cups of juice. Stir until the sugar is completely dissolved.
-
Skim the foam: As the mixture boils, you may notice foam forming on the surface. Skim this foam off with a spoon to ensure a clear jelly.
-
Test the jelly: Once the mixture reaches a rolling boil, remove it from the heat. Dip a cold plate into the mixture and let it cool for a few seconds. Place a drop of the mixture on the plate and wait for a few minutes. If the jelly sets and holds its shape, it’s ready to be poured into jars.
-
Pour the jelly: Ladle the jelly into sterilized jars, leaving a little headspace at the top. Wipe the jar rims with a clean cloth and seal the jars with lids.
-
Process the jars: Place the sealed jars in a boiling water bath for 10-15 minutes to ensure they are properly sealed. Remove the jars from the water bath and let them cool completely before storing.
Health Benefits of Sand Cherry Jelly

While sand cherry jelly is a delightful treat, it also offers several health benefits. Here are some of the key advantages:
-
High in antioxidants: Sand cherries are rich in antioxidants, which help protect your body against free radicals and reduce the risk of chronic diseases.
-
Source of vitamins: Sand cherry jelly contains vitamins A, C, and K, which are essential for maintaining healthy skin, bones, and immune function.
-
Low in calories: Sand cherry jelly is a low-calorie dessert option, making it a great choice for those watching their calorie intake.
-
Good for digestion: The pectin found in sand cherries can help improve digestion and reduce the risk of constipation.
Culinary Uses of Sand Cherry Jelly
Sand cherry jelly is a versatile dessert that can be enjoyed in various ways. Here are some creative culinary uses:
-
Spread on toast: Sand cherry jelly makes a delightful spread for toast, bagels, or crackers.


