
Sand and Shell Centerpieces: A Detailed Guide
Are you looking to add a touch of natural elegance to your next event? Consider creating a sand and shell centerpiece. These unique and eye-catching decorations can transform any space into a serene and inviting atmosphere. In this article, we will delve into the various aspects of sand and shell centerpieces, from their creation to their usage in different settings.
Materials Needed
 To create a sand and shell centerpiece, you will need the following materials:
- Sand (preferably fine, white sand)
- Seashells (various sizes and types)
- Marble or glass bowls
- Water (for some designs)
- Decorative stones or pebbles (optional)
- Flowers or greenery (optional)
Creating the Base
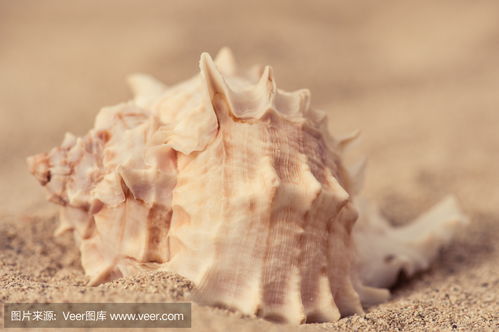 The foundation of your sand and shell centerpiece is the sand. Begin by spreading a layer of sand in the bottom of your bowl or container. This layer should be thick enough to support the weight of the shells and other decorations. For a more textured look, consider adding a layer of decorative stones or pebbles on top of the sand.
Once the base is in place, you can start arranging the shells. Place the larger shells first, creating a framework for the smaller ones. This will give your centerpiece a balanced and visually appealing structure.
Arranging the Shells
 Shells can be arranged in various patterns and designs. Here are a few ideas to get you started:
- Random Layout: Scatter the shells randomly across the sand, creating a natural and organic look.
- Circle Layout: Arrange the shells in a circular pattern, with the largest shells at the center and the smaller ones towards the edges.
- Stacked Layout: Stack the shells on top of each other, creating a tall and dramatic centerpiece.
- Geometric Layout: Arrange the shells in a symmetrical and geometric pattern, such as a triangle or square.
Feel free to mix and match these ideas to create a unique design that suits your taste and the theme of your event.
Adding Water
For some centerpiece designs, adding water can enhance the overall look. This is particularly effective when using translucent shells or when you want to create a reflective surface. To add water, simply pour a small amount into the bowl or container, ensuring that the shells are submerged just enough to create a smooth surface.
Keep in mind that water can make the sand settle, so it’s essential to add water after arranging the shells. Additionally, be cautious when handling the centerpiece, as it may become slippery when wet.
Enhancing the Look
To take your sand and shell centerpiece to the next level, consider adding the following elements:
- Flowers: Arrange fresh or artificial flowers around the shells to add color and texture.
- Greenery: Incorporate greenery, such as eucalyptus or ivy, to create a natural and earthy vibe.
- Decorative Stones: Add decorative stones or pebbles to create a more textured and visually interesting base.
Experiment with different combinations to find the perfect balance for your centerpiece.
Usage in Different Settings
Sand and shell centerpieces can be used in various settings, from weddings and parties to home decor. Here are a few ideas:
- Weddings: Create a beach-inspired centerpiece for an outdoor wedding or a coastal-themed event.
- Parties: Arrange a series of sand and shell centerpieces around the venue to create a cohesive and inviting atmosphere.
- Home Decor: Place a sand and shell centerpiece on a coffee table or dining table to add a touch of natural beauty to your living space.
Remember that the key to a successful sand and shell centerpiece is to let your creativity flow and experiment with different designs and arrangements.
Conclusion
Sand and shell centerpieces are a beautiful and versatile way to add a natural and elegant touch to any event or space. By following these guidelines and experimenting with different designs, you can create a centerpiece that is truly unique and memorable. Happy crafting!


