
How to Sand Hardwood Floors: A Comprehensive Guide
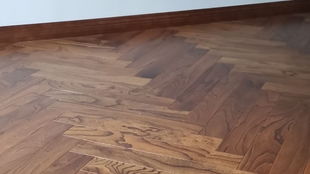
Hardwood floors are a classic and elegant choice for any home. Over time, however, they can become worn and scratched, requiring a bit of maintenance to restore their original beauty. Sanding hardwood floors is a crucial step in this process. In this guide, I’ll walk you through the entire process, from preparation to finishing, to help you achieve a smooth and polished surface.
Understanding the Sanding Process

Before diving into the sanding process, it’s important to understand what it entails. Sanding hardwood floors involves the removal of the top layer of finish to reveal the raw wood beneath. This allows for a new finish to be applied, which can enhance the floor’s appearance and protect it from future wear and tear.
Preparation
Proper preparation is key to a successful sanding project. Here’s what you need to do:
-
Remove all furniture and decorations from the room. This includes anything that could be damaged by dust or sanding.
-
Cover any non-hardwood surfaces, such as carpet or tile, with plastic sheeting to protect them from dust.
-
Seal off the room to prevent dust from spreading to other areas of your home. This can be done by closing doors and windows, or by using a dust barrier.
-
Check for any loose or damaged boards and repair them before sanding.
Choosing the Right Equipment
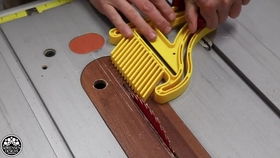
There are several types of sanding equipment available, each with its own advantages and disadvantages. Here’s a breakdown of the most common options:
| Equipment | Description | Pros | Cons |
|---|---|---|---|
| Hand Sanders | Manual sanding blocks or orbital sanders | Portable, easy to use, and cost-effective | Time-consuming, less effective on large areas |
| Edger Sanders | Used to sand the edges and corners of the floor | Accurate and effective for hard-to-reach areas | Can be expensive, requires some skill to use |
| Belt Sanders | Large, powerful sanders that cover large areas quickly | Fast and efficient, suitable for large projects | Expensive, heavy, and requires some skill to use |
For most homeowners, a combination of hand sanders and edger sanders will suffice. If you’re working on a large project, a belt sander may be a better option.
The Sanding Process
Once you have the right equipment, it’s time to start sanding. Here’s a step-by-step guide:
-
Start with a coarse-grit sandpaper (around 30-40 grit) to remove the existing finish and any deep scratches.
-
Use a hand sander to sand the entire floor, following the grain of the wood. Be sure to sand in long, even strokes to avoid leaving swirl marks.
-
Use an edger sander to sand the edges and corners of the floor, as well as any areas that the hand sander couldn’t reach.
-
After sanding with the coarse-grit sandpaper, switch to a finer-grit sandpaper (around 60-80 grit) to smooth out the surface and remove any remaining scratches.
-
Repeat the process with finer-grit sandpaper (around 100-120 grit) until the floor is smooth and even.
Finishing Touches
Once the sanding is complete, it’s time to apply a new finish. Here’s what you need to do:
-
Choose a finish that suits your needs and preferences. Oil-based finishes are durable and provide a rich, glossy look, while water-based finishes are easier to apply and have a lower odor.


